Thursday, March 7, 2013

Menu Planning!

~For the Home Notebook!

Several months ago, I made a Pinterest inspired dinner menu board.  The of the menu board was to allow me to plan meat thaws and crazy evenings ahead of time.  It also eliminated the "what's for dinner?" question from being asked 100 times a day.  I absolutely adore it!

Two months ago, I started making a home notebook, to keep my otherwise crazy life seem a lot less crazy!  I thought that it would be easy....but, like everything else in my life...it's NOT!  I am very picky and have certain needs of a home notebook that others just seem not to.  There are a LOT of great free printables (there will be a post on these in the future) but only a few actually worked for my specific needs.  That has left me making my own!

Because making my own has taken much longer than I realized, I decided to post on them a section at a time until this project is completed.  I will bring it all together and post links to this post and others like it when I do.

Here is Installment ONE!  Menu Planning!

I always start my shopping list with my dinner menu.  I sit down, create my menu and then make a small shopping list of the items I need to complete all seven dinners.

Dinner Menu Shopping List

Download the Dinner Menu HERE!

I then pull out my shopping list and make a list of items I need for breakfast, lunch, snacks and other household items (like baggies, dish soap, etc) since I shop for all of these things at the same time

Shopping List

Download the Shopping List HERE!

I take both sheets with me to the store to make sure I get everything I need for the next week.

Both of these forms call home in my menu planning tab in my notebook!  Look for the next installment "Kid's Info Pages" within the next week!

~Happy Planning!
Brandie
Chic on a Shoestring Decorating
The Girl Creative button

Tuesday, March 5, 2013

St. Patrick's Day Ribbon Tutu!

My daughter and I were scopin' out the local Hobby Lobby today (little down mother/daughter time).  I am getting ready to venture on a new path in life and that path always leads me to the nearest fabric department!  While visiting Hobby Lobby's, my daughter and I stumbled across some shamrock, glitter tulle.  It's been a while since I made her a tutu and since the tulle was 50% off, I thought, what the heck!

I bought a yard and half (learned later, I should have gotten 2 yards....my girl is getting big!) of the shamrock tulle and spool of the gold glitter tulle (oh my the glitter...I think more ended up on my floor than stayed on the tutu!).

I paid $3.74 for the shamrock tulle and used a 40% off coupon on the spool gold tulle, making it $2.39.  I thought that I still had elastic at home (my preferred method of making tutus), but I didn't.  So, instead of running back out to the store, I used some green ribbon I already had (it doesn't really match...but the only place you see it is in the back).

I cut the shamrock tulle into 6 inch strips so that it would match the size of the spool tulle (spool tulle is exactly 6 inches wide).  I kept the tulle folded in half like it is when it is cut by the yard.  After the strips were cut, I took each one and cut them exactly in half.  This makes each strip 29.5 inches long.  To ensure all my pieces were even, I cut the gold tulle at the same length.

The yard and half of shamrock tulle made 18 strips and the gold made 14.  I stacked my pieces in the pattern I wanted them on the waste line of the tutu.  I then measured my daughter's waist and added 6 inches to each side so I had room to tie and untie the ribbon.

This tulle is really shear so we will be devising ideas to complete the outfit for the big Green day!  St. Patrick's Day is fun time in my household and the last few years, it's been great having it on the weekend!

When sis and I finish the outfit, we will for sure share it! 

~Happy Crafting!
Brandie

House of Rose

Monday, March 4, 2013

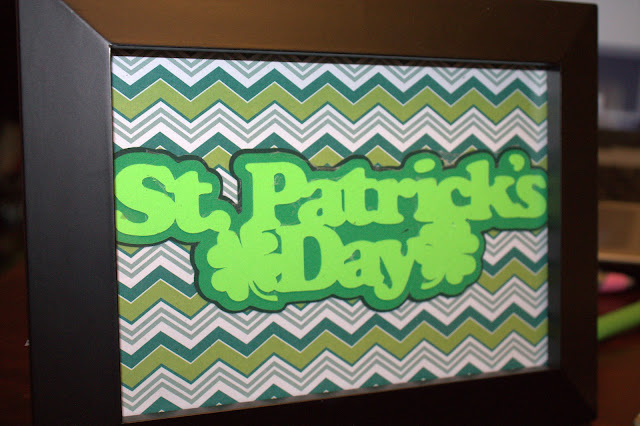
Cricut St. Patrick's Day Frame!

Coming up with creative and inexpensive ways to decorate my mantel has been somewhat challenging.  However, I did find a project that I can use over and over for each holiday and season!  I bought a $5 frame 5x7 at Micheal's and decided to make my own "art" to go in it.  I can change it whenever I want and the "art" can be stored for use next season!

I used my Cricut Craft Room Exclusive cartridge Classroom-Feb. & March to cut the phrase.  It was three cuts total (for the three different layers).


I cut this phrase at the 2 inch setting.  This is just at 7 inches long.  

After all the cuts were done, I ran it through my 2.5 inch sticker maker,


I then layered up the phrase appropriately.  I then marked off the center of my background.  I had already cut some patterned paper into the 5x7 size for the frame.  After I found the centers, I placed the phrase on the background.


I placed the "art" work in the frame!  Now, it's ready for the mantel!


I have a couple of other ideas to fill up the mantel with fun stuff!  I will you keep you posted as they come together!

~Happy Decorating!
Brandie
Chic on a Shoestring Decorating

Sunday, March 3, 2013

Mega Monday Sale at HyVee!

General Mills Cheerios Flavors Cereals 2/$3

HyVee Milk (2%,1%, Skim) 2.99 per gallon (limit 2)

Poweraide Sports Drink 10/$9 (plus 10 cents off gas)

Hamburger Helper $0.69 (limit 3)

85/15 Ground Chuck 4lbs for $10