Tuesday, November 18, 2014

A Dollar Tree Christmas Village!

I have always wanted one of those light up tiny villages with the little houses and shops and the little people.  I find the cost to build such a town to be very much out of my reach!  Last weekend, we were shopping the clearance racks for next year's Halloween (decorating a home is expensive lol) and wondered into a Dollar Tree.  They, like the rest of the world, had their Christmas merchandise out on Nov 1st.

On a little end cap on our way out I found the small pieces to a Christmas Village.   With everything just a $1....how could I pass this up?!?

I spent all of $20 and got all of this.....


Cute isn't it?!?  None of the pieces light up BUT I can afford to get one or two to complete the look and be VERY happy :D

Next on my list....a Faux Fireplace....this is going to be FUN!

Faux Fireplace!

Our move over the summer left us in a home without a fireplace!  While we love our new home, Santa needed a way to get in and the kids needed a place to hang their stockings!

I search the Pinterest looking for "No Fireplace Stocking Ideas" and I came across some super cute ideas!

Here is what I came up with :)


Here is how I did it!

Supplies:
Board Game Boxes from the Post Office (can be ordered FOR FREE!)
White Craft Paper
Red Scrap Book Paper (cut into 3x4 inch rectangles)
Tape
Glue
Cutting Tool

I decided on how I wanted the fireplace to look.  I taped the pieces together with boxing tape. 

I then taped the craft paper around the whole thing.

Lastly, I glued the red "brick" pieces in a brick like pattern.

Once done, it was ready to decorate!

The kids love it and now want me to fashion a faux fire....man, I love Pinterest ;)

Wednesday, November 5, 2014

A New House! New Rules! And someone got his own room!!

Three months ago, my family packed up and moved to a new town.  Not too far away (next door actually).  We need a new scene.  My boys were getting bullied and the oldest was struggling academically.

We tested the waters out but joining this new town's baseball league.  We thought it would be a great way to get to know some of the people we would spend a lot of our time with if we moved and it would allow the boys to look at a game they love with new eyes.

The football and baseball season that preceded this spring were horrible!  From grown men bullying their players (and no....not it the way some think is okay....straight up in my son's face calling him a cry baby and another telling my son he is failure at life and will amount to nothing....mind you...because one kid couldn't take 20 tackles in a row from a kid THREE TIMES his size and the other for getting struck out for the second time in  single game), to violently touching my sons, to well....it was just ugly.  It's several different coaching staffs and we were DONE!  For a while, my boys were going to quit sports altogether....afterall the town we lived in made it very clear that they were not good enough...so why bother??

The prospect of getting to show what they know about the games they love to strangers was very exciting for them.  They flourished in ways I never thought possible.  In this one season of baseball, we found a handful of partners in helping my boys cope their PTSD, handling parenting struggles we were having at home, and a new family of friends.  As the baseball season came to a close, the decision was made.  This place was home!

It was a hard fight to find a home....from our current property management place (with which we lived THREE years) telling lies about us to our prospective new landlord to coughing up an extra months rent to secure the lease....we fought!  I was so pleased with the result.

We live in an actually home! not some townhouse that is barely big enough to house this family.  We have a three bed room, single dwelling, with a finished basement and a fenced in yard.  Oh my...the deck!  I mean seriously!! For just a few bucks more a month we got SO MUCH more!  I mean seriously....I am in love with this simple home.

There were quite a few rules that had to be implemented with the new home...rules that pertain to outside time, TV time, cleanliness and the like.  The kids very rarely were allowed to play with neighborhood kids and so they spent a lot of time inside playing with one another.  This neighborhood seems to lack the animal torturing, property damaging youth that our last one had and so outside play is more encouraged here.  There are also more chores that need to be done with the space and that has been quite the adjustment.

I am working on a chart that was suggested to me by a friend....that will be coming soon!!!!

The finished basement has allowed us to give our oldest son some much needed privacy that he had been requesting for quite some time.  He got his own room!  It has been an experience decorating and arranging it to his liking!!  It is far from finished as the child was lacking in possessions!  He moved in with a bed!  The dresser he used was a shared cubby system with his brothers...so he needed a dresser, an entertainment center, a shelf...wall hangings...you get it...he was starting over!

We lucked out and found the cutest entertainment center for $7 at Walmart on clearance!  He hasn't decided what kind of shelving he wants and the dude needs a chair to sit in!  His bed is a loft bed...so sitting on the bed to read or chat with his friends is not an option.

I have a few ideas pinned on Pinterest and will share any projects that are used to wrap up his room!  I am so very excited for him....it's really hard to believe that I have less then 6 years left with the boy.

~Brandie

Monday, March 24, 2014

How I Explain the Easter Bunny!

This year is going to be the toughest to get ready for!  With my sons getting older and the oldest getting to the age of not caring about Holiday fun and trinkets, I found myself at a bit of a lose.  My daughter, thankfully, still believes in the magic and connects to God with the holidays.  Don't get me wrong, my boys understand the meaning of Easter quite well....I am talking more specifically about how the Easter Bunny relates to God, Jesus and the stories.  Growing up, one of the things I found the hardest to wrap my head around was how the Easter Bunny, Santa Clause and the rest of the fairytale creatures we use to create mystery in the lives of children connected to the holidays we were celebrating.  As my children grew themselves, I created ways to connect these things so that they made sense.  Santa Clause was one of the three wise men who loved the feeling of giving to Jesus on his day of birth so much that he set out to do it every year for all the children.  This is his way of celebrating that great day.  We remember the gift of the wise men to baby Jesus when we gift to one another.  The Easter Bunny was and still is a hard one to sell.  Santa as a Wise man was so easy to thread together....

Here's my Easter Bunny story....on the day that Jesus died a bunny was present and saw the whole thing.  He followed Jesus to his grave, and saddened by the events he witness stood near the tomb for the days that followed.  When God brought Jesus back to life, the bunny was there and some of his magic and power touched that little bunny.  To celebrate the return of Jesus the little bunny set out to celebrate.  It started with sharing the news with all of his animal friends, mainly chickens!  To show the humans how grateful they were for Jesus's resurrection, the animals left treats and...well...eggs...at the doors of the humans they knew.

(Look I know I am reaching here....but when you want a holiday to make sense to children who ask a LOT of questions...this is what you end up with)

As time passed the Bunny continued to live, from that Godly power that splashed over him.  Every year on the anniversary of Jesus's Resurrection, he would set out to deliver treats and goodies to all who believed.  He realized over the years that he could slow down time....just like Santa...so he could reach all the Christian children of the world.

I found it my duty to ensure my children didn't get bogged down with the commercial views of holidays.  Telling stories like this one allow us to celebrate with all the fun and still remember and understand why we are celebrating in the first place!

What stories do you tell your children??

Thursday, February 6, 2014

A Black Heart Valentine's Collection Box

Yesterday, we had our 2nd snow day in a row.  So I decided we were going to get some things accomplished.  One of those things was the younger kids' valentine collection boxes.  This is my daughter's first year getting to make one and pass out valentine's so I assumed she would go all super girl on me.

I bought the boys heart shaped boxes last year and painted them to appear like Minecraft Hearts (there is a link at the end of this post to find those).

So, I bought the princess and sweet little girl that calls me Mommy a heart shaped box I found at Hobby Lobby, because I knew how much she wanted one last year.  I pulled it out and said "What colors do you want to paint your heart box?" fully expecting to hear pink or purple.  Nope.  This girl shouts with a massive grin BLACK!  I tried to talk her out of it.  No luck.  I did get her convinced that the hearts there were molded into the sides of the box can be red and pink.

And you can bet your butt I did all I could do to make this dark and evil looking heart look awesome...I sprayed that thing with gold glitter!

She is happy with it and really at the end of the day, that is what matters.  Children are really good at throwing us for a loop and stopping us right where we stand.  My daughter is a bit of an expert in that.


Check out the other Valetine's Projects we've completed so far:

Bubble Stick Valentines -->  HERE!
Star Legos Valentines -->  HERE!
Minecraft Heart Collection Valentine Box -->  HERE!
Have a Ball Valentines -->  HERE!

Tuesday, February 4, 2014

Star Wars Lego Glow Stick Valentines!

My oldest son was easy when it came to Valentine's Day.  I could make whatever I wanted, he would pass them out, didn't care what people thought, he gets candy, I get to craft...win/win!

Son #2....yea, not so much!  He's my show off.  Everything has to be "cool" and not "girly" and blah blah blah!

Coming up with a Valentine was difficult, but buddy, Pinterest was here for the rescue!!

I found a blogger who has a son that loves Star Wars Legos as much as Son #2 and she has saved my rear!!

HERE is the link to the printables!  She made them with a white background and colored background.  Whatever tickles your fancy...I chose the white background.

I am OUT of white cardstock and since I just bought a ridiculous amount of colored cardstock, I decided to not tip the boat of insane Micheal's shopping and give the fiance a heart attack.  I printed on regular printer paper.

Then I took a sheet of 8.5 x 11 in red cardstock and cut each sheet into fours.  I then ran the printables, cut out of course, through my sticker machine.

Once that was done, I placed my new stickers on the red card stock sheets.

Next, I cut a slit, well technically three slits on the lightsaber area of the picture.

I slide my glow stick downward (so from the front to the back) through the slits I cut.

To hold the glow stick in place, keeping it's "cool" factor alive, I placed a piece of tape on the back.

Son #2 is raving about these and very excited to pass them out!

Check out my other Valentine's Posts:

Bouncy Ball Valentines--> HERE
Bubble Stick Valentines -->HERE
Minecraft Heart Collection Boxes --> HERE

And watch for more posts this week.  I still have one more kiddo looking for a Valentine and three boxes to make....not to mention the Mantel (that's coming tomorrow!).

~Happy Crafting!!
Brandie

Bubble Valentine's

This year is my daughter's first year to pass out Valentine's.  I was so over the fold in half cards years ago! (Her oldest brother turns 12 this year).

She got to pick out an item to pass out and I made matching tags.

She chose Bubble sticks we found at Micheal's Craft Store.

I printed off a full sheet of of the phrase "You 'blow' me away, Valentine!" on colored card stock.

I cut them out with my straight cutter and ran them through the sticker maker.  I found some patterned scrapbook paper, and cut each sheet into fours.

I determined the layout I wanted and then cut two slits on the left hand side of the paper.  I slide a piece of ribbon through these slits and tied the bubble stick on the paper.

I then placed the sticker onto the right hand side of the paper.  I will have the daughter sign her pretty John Hancock to it and then they will be ready for her Valentine's party!

Watch for two more Valentine's that we will doing this year and also check out the Valentine's we did last year, here!

Sunday, February 2, 2014

PYP Project: Hair bows and Head Bands!

Anyone who knows me well, knows I can get enough of Pick Your Plum!  Today the daughter and I sat down with some bows and head bands I bought a while back.

This is a fun way for us to spend time together among our super busy lives!

We were able to make a TON of bows and quite a few headbands!  The daughter was so excited about them <3 p="">


You can find daily deals for PYP in the top left hand corner of my webpage just under neath the page links.  They change every day and are available for 36 hours or so...or until they are sold out!  I am an affiliate, so if you click my link, I get a little kick back!  It's a fun and easy way to support the blog!

~Happy PYP Crafting!
Brandie

Friday, January 31, 2014

Puff ball cupcakes toppers

I used these at my friend's baby shower and loved them so much I am doing them again for my daughter'a birthday party.

These are the simplest project I've done to date.

You take a toothpick and poke it through a glitter Pom Pom ball....and you're done!!

You can get a pack of single colored pom poms at Hobby Lobby or Micheals for $1.99 and toothpicks wherever you choose to buy those.

~Happy Crafting 
Brandie 

Pin the Cutie mark on the Pony Game!

My crew love pin the "something" games!  They are a huge hit no matter what the age, so far....  My daughter is having a My Little Pony Birthday party tomorrow! 

Here is the Pin the Cutie Mark board game we made yesterday.

It took a little time to get the body and eyes right on Pinkie Pie, but with the help of a projector, I was able to get the job done :).

Once she was penciled onto the foam board, I painted the hair first.


Next I painted her body and added the accent marks in her tail, ear and nose.

I used to outline all my projects by hand, but I found this nifty new tool that makes everything looked polished!  The Sharpie paint pen....I LOVE them!


I used the paint pen to outline Pinkie Pie and draw in the blacks of her eyes.

Do you see where I messed up a bit on her back legs?? Fixed that with white paint :D.  I used two different sizes of round sponge brushes to paint the whites of her eyes and then finished her up by painting in the blues of her eyes.

This is so far....my favorite project!!  


I printed the cutie marks off on the computer and can't wait to see how the kiddos do at getting them on the flank of Pinkie Pie!

~Happy Party Planning!
Brandie

Saturday, January 25, 2014

Nerf Gun War Birthday Party!

We played "Nerf War" at my son's birthday party this year.  It was a TON of fun, he had a blast and the turn out of kids was massively larger then any year past.  This party has been the talk of the town since the invites went out....it's been almost a week and the kids are still talking about.

This was the easiest party to get ready for.  My son would not let me buy him balloons....did I mention is now 10 and too grown up for baby things??

Here is the set up!


We supplied the following:

Nerf Guns
We let kids bring their own guns if they wanted to, however we encouraged them to leave their bullets at home

Nerf Bullets
I lucked out and got a Cartwheel deal for 10% off Nerf Ammo.  I only need to buy one large package to accompany the bullets we already had

Camo Boxes (to hide behind)
We collected used moving boxes from some folks we know and painted them with Camo paint.  We used the Camo line from Krylon that we found at Walmart for about $3.75 each.


Camo Banner
This lovely piece, I had to beg my son to allow me to use ;).  I used my Cricut to make this.  The pennants are actually a food topper flag that I enlarged and cut in half.  The cut came from the digital download Party Picks and Pennants.  The letters are from the Cricut Opposites Attract Font Cartridge.  The Pennants were cut at 2.5 inches and then cut in half once I pulled them from the mat.  The letters were cut using the "Add text" option default size.  I bought the Camo paper the letters were cut out of at Hobby Lobby.  The ribbons were cut from the Cricut Stand and Salute Cartridge.


Camo Decor
The table cloth, plates and napkins were all purchased at Hobby Lobby.  I was surprised at the lack of camo party gear available at Walmart and Target.

Camo Centerpiece
I love doing these painted themed numbers for my kids' parties.  I started them with this child turned 8 and they are huge hit with them.  The numbers can bought at Hobby Lobby for $2.57 each and they go on sale quite often.  The camo paint was done free hand.

Camo Cupcakes
The liners, again, were found at Hobby Lobby.  I used that spray paint food coloring to make the camo look on the icing.  This was fun but I will warn you that you need to clean it off your counter tops quickly...we got a little stain from the green!

Party Favors
The kiddo found these adorable dog tags at Hobby Lobby when we were buying the other party supplies we needed and just had to have them for his friends.  Word on the street is that about half of them are wearing them to school ;)

~Happy Party Planning!
Brandie

Friday, January 17, 2014

Hearing Aid Consult with my 8 year old!

With all the craziness of my second oldest turning 10 this week, I have not given myself the proper time to process the reality of today and tomorrow.  Last week, my youngest son (child #3) was diagnosed with permanent hearing loss.  It's not across the board, hence why he is 8 and we are just now figuring it out.  He can hear low tones just fine, but mid to high tones have to be so loud that by the time he hears them....it's at a level that hurts a normal hearing person's ears.

Today we consult for hearing aids.  This will allow him to hear all tones at "normal" level and hopefully get rid of the pain of being in a loud room (like his lunchroom).  I am nervous and anxious for my boy.  He is concerned about the aftermath when his friends realize that he went from being "normal" like them to "the kid with hearing aids."  He has good friends with good parents, so I am hopeful that all will be fine in his world.

The big kicker and question answer-er (word??  Well....it is now!) will be the MRI tomorrow afternoon.

We are choosing to attempt this bad boy without sedation.  My boy has already had two surgeries that required sedation and if we get the answer we want, he's almost guaranteed a third trip.  I do not want his body building an immunity to the medication needed for that (call me crazy...I don't care....my kids are immunized, so I can have this one!).

The questions:

What?!?!?!  I just thought he got anxious in large crowds with lots of different noises at once (because I do).

How long has this been here?  The son claims forever (talk about a debbie downer in parenting!)

What is causing it?  When we did the hearing test, the oncologist determined that whatever it is...is between the bones of the ear and the nerves.  His ear canal and drums look perfectly normal and healthy.

Can we fix it???  Is there a life for him without hearing aids?

If we can't fix it....now what? How do we move forward?  Do we need to adjust his entire life??

Here are some questions that I probably won't ask in front of my son but am secretly trying to answer on my own:

Is my son "special needs?"
Do I need to parent him differently?
Is his life going to change for the worse?
How on earth did he make it 8.5 years without me noticing!?!

Our chins are up!  We are optimist that this will get figured out swiftly and can be fixed!  We are grateful for the doctors who are caring and swift with their diagnosis and treatment!

Bring it on!!
( In a deep base tone so my boy can hear it without it hurting!!)

Friday, January 10, 2014

Camo Birthday Invites!

It's that time of year where we have to start getting ready for son #2 to age!  The last couple of years we have done football themed parties.  This year, he decided to change it up!!  We are doing a "Capture the flag" Call of Duty kind of Nerf Gun War theme.  Yeah, that was the best I could come up with ;)

These are the invites we made!


Pretty cool huh?!

To make these exact ones you will need a Cricut and the Stand and Salute Cartridge.
(Don't a Cricut yet??  Check out the ad on the left hand side and get a killer deal on one!)

I used the Camo Cut on Shift, cut at 3 inches.  Now, when you do this you need to note that the cut is meant for you to keep the pieces that are cut out.  What I did was remove those pieces (for another project down the road) and cut, as even as I could, around the camo cut out.  What you see here is the end result.

I then used the envelope cut at a custom size.  I manipulated the shape to ensure that the camo cutouts I made would fit on the envelope once it was folded.

I then printed out info pieces about the party for the inside of the envelope.

For both the camo and the info pieces, I ran them through my sticker maker (so much faster and less messy then using glue).
Here is what they looked like closed.  We used a single piece of tape to hold these down.  To fold them, fold in the sides first, then bottom flap, then the top pointed flap.


These are getting passed out during class today and the boy is pretty excited about them!

Thursday, January 9, 2014

Up-Cycled Side Table!

The daughter has been using an old end table as her TV stand and her cable box and DVD player set on the floor.  She had a 20 inch old school TV on this table and rarely uses it.  She got a bunch of new DVDs for Christmas and we had been talking about giving her the larger old TV we used to have in our bedroom.  The stand she has...not gonna hold it.  We went digging through the garage to see if there was any old furniture in there (our garage became a storage unit when we decide to start living together).  We found a two drawer end table I had meant to throw out over the summer.   It was in bad shape, stained and dusty from sitting the garage...see for yourself...YUCK!

We also found a left over piece of sheet rock that has vinyl covering over.  We took out the drawers, removed the center bar used to slide the drawers in and out.  He sanded down the end table and spray painted it "Princess Blue" with paint we had bought for another project.

We used the sheet rock pieces we cut down as shelves and now she has a new TV stand complete with shelves for her box and DVD player!

I am so very excited about this.  There are several reasons: 1. The Fiance and I got to bond alone!  2.  This didn't cost us a dime!  Everything we used was already here and 3. The daughter got a much improved look and piece for her little bedroom!

Projects like this are a great way for us to put use the things we each enjoy and put them together to create something we both love!


Tuesday, January 7, 2014

A Baby Shower!

With my youngest child about to turn 5, I was ubberly excited to be able to plan this shower!  My friend Kasey is special one!  The mother of three boys, starting her family at the same age I did was defying odds that day at baseball practice when she announced her fourth pregnancy.  Her oldest the same age as my youngest son, was followed by two crazy little boys ages 3 and 2.  What makes pregnancy number 4 so special....Kasey had her tubes tied after her third son was born.  Although all the sports mommies were secretly wishing for her to have girl, we are all very excited to meet Kasey's fourth little boy, Brady!

She's probably going to kill me over this photo...but that's okay ;)  It is hands down my favorite!

Okay, on to the shower details!!!  It was so much fun to buy for baby again!


I fell in love with this blue zebra and leopard print design!  I found it at Party City but I am sure it can be found other places.

Here is a list of the designed items I bought
Dinner Plates
Dessert Plates
Dessert Napkins
Table Cloth
Dangle decor Set
Table Top decor Set

Here are couple close ups on my cupcakes:


I bought the zebra cupcake sleeves at Hobby Lobby.  The pack of 24 were $2.99  The puff toppers and letter toppers I made.

Here are the details:
To make the puff toppers you will need the following:
Craft Pom Poms
Toothpicks
You simply stick the toothpick in the pom pom puff balls.

The letters and banners required a little more time and work.

I used my Opposites Attract Cricut Font to cut the letters out at 2.5 inch settings.  I used the "opposite" font coupled with the "opposite shadow".  The banners that read "Here Comes" are the same lettering but placed on a Cricut Pennant cut.  I cut out the Pennant at 2.5 inches and then cut it in half to make the banners.  I glued each pennant to a ribbon and attached the ribbon to lollipop sticks.  "Brady" is attached to toothpicks.


This is a concept I first saw on Pinterest, yet I am not sure who, what, or where.  It was an idea from another type of Safari Shower.  I added lollipop sticks (some with ribbon bows).


I had originally planned to do dipped marshmellows and strawberries, but while we were setting up, Mommy dug out her fondue pot that had never been used...so we put that bad boy to use and made a small Fondue Bar <3 p="">

The puppy chow you see pictured was meant for popcorn bags I bought...however, I forgot to fill them! Oops!

Party Favors consisted of a small Candy Bar

I got Hersey's Kisses at Micheals that have tags that say "It's a Boy", are which just too flipping cute!  I also found light blue Sixlets at Hobby Lobby.  Both the Kisses and Sixlets were $5 a bag.  There are two bags of Kisses and one bag of Sixlets.  The bowls the kisses and sixlets are in came from Party City and were just $1.99 each.  The M&Ms are the by the pound kind I bought at my local HyVee. These are little pricy but HyVee had the better price on them.  They were $9.99 a lb (compared to $7.99 per 8 oz at Party City and other places).  I bought 3.5 pounds between the four colors.

Baby Shower Games


The Price Is Right was fun double whammy for me!  It was one part gift for baby and one part game!  The concept of this game is to guess the cost of each item to get a grand total that is as close to the correct amount without going over.

I printed off sheets I found on Pinterest.  You can find a ton of options, some with pre-made lists and other, like the one I printed, that are blank for you to fill in yourself.


I bought a book of sheets for an "A to Z" game.  This game is really fun.  You get a timed amount of time to write down a word, phrase, or baby brand that match each letter of alphabet.  At the end of the time given (we did two minutes), you read aloud the answers you have.  If more than one person wrote down what you have written down, you scratch that word out.  The person with the most answers that are unique wins!  The book was $2.99 but you could easily make your own if you wanted to.

Baby Trivia was fun.  Another Pinterest print out, this game was used to break the ice as not everyone at the shower knew each other.  Very few people got these questions right, it was a fun time!
Here is a link to the trivia game I used.

"What was Mommy Wearing" was yet another Pinterest inspired game.  This game was rigged for Mommy to win.  You play this game by having Mommy leave the room unannounced, pass out the sheets and guest have to answer questions about what Mommy was wearing.  These questions included was Mommy wearing a necklace, were her nails painted, etc.  Since Mommy knows all the answers, she wins ;)
I made this printable myself :)

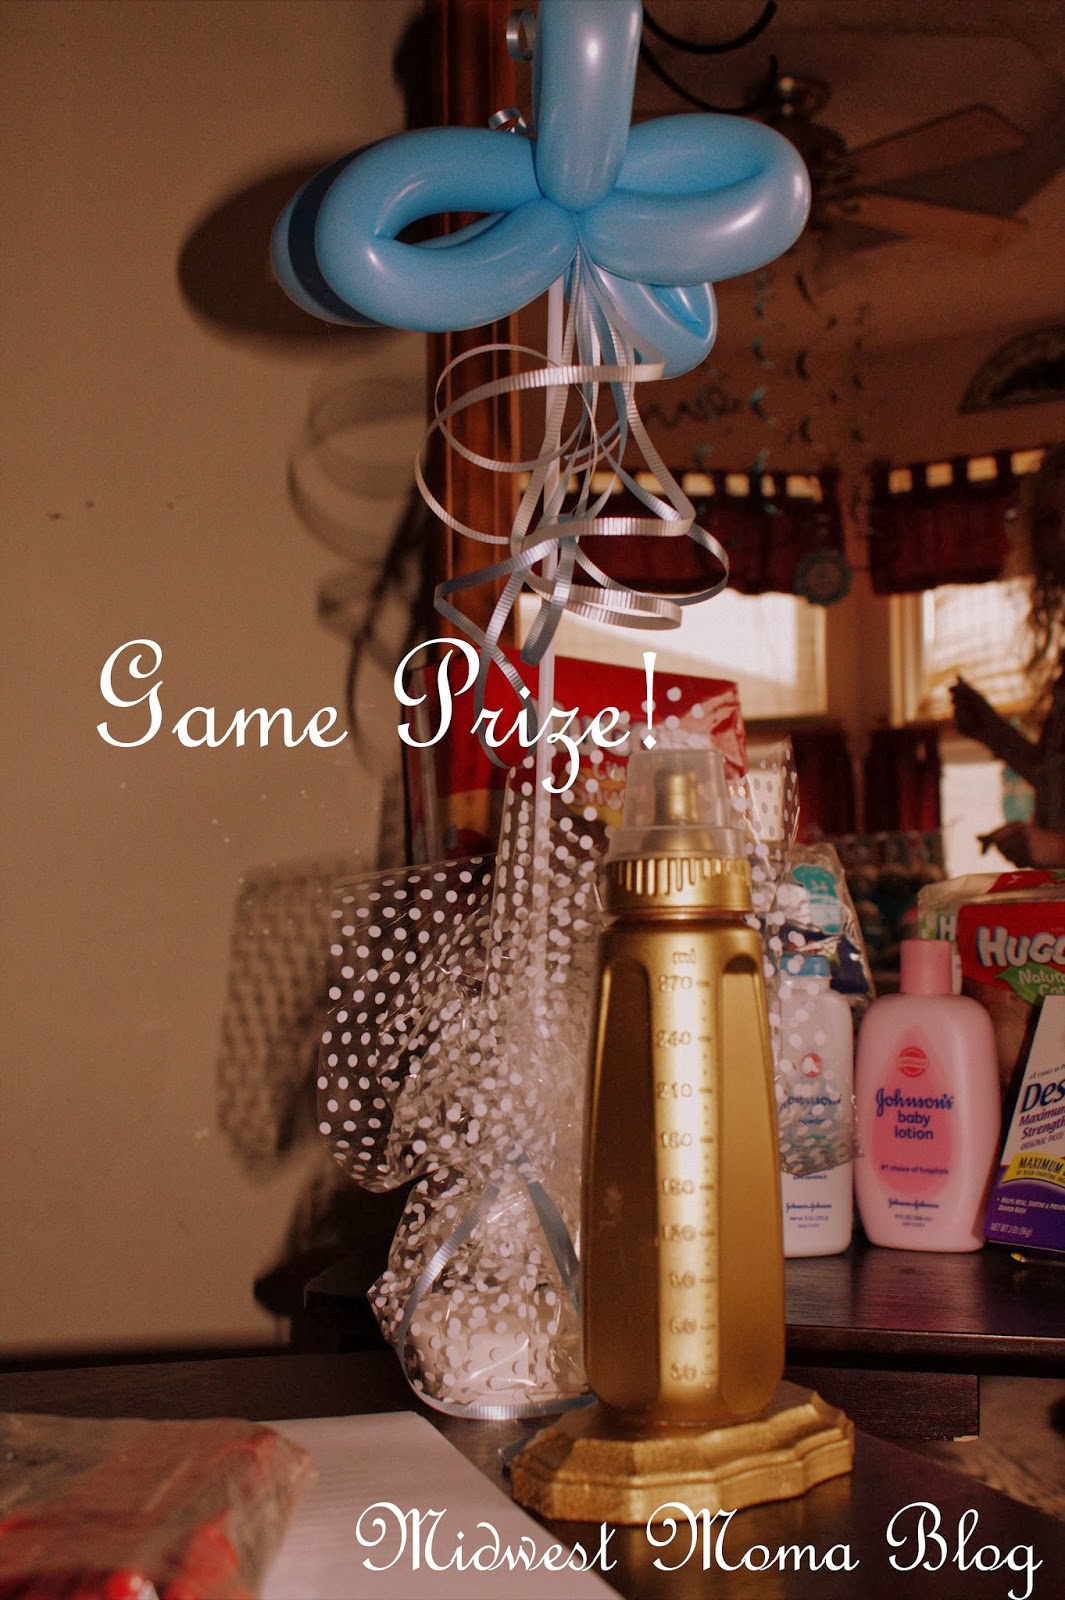
I am betting that you have been trying to figure out those golden bottles.  No, they are not decor pieces.  They were the prizes!


These were hands down my favorite part of this entire shower!  I bought cheap, $1 bottles and glued them to a wood piece I found at Hobby Lobby.  I then spray painted them Gold!!  They were a huge hit (despite the slight running and some digs in the car ride to the party).

My gift to Mommy!
I have been there, done that with a fourth pregnancy that blind sided you.  My daughter was born with a failed vasectomy Three and half years after my third son.  Getting prepared for baby in this circumstance requires a lot more then the items needed to care for baby.


I got Mommy a Hospital Care Package.  It included soap, shampoo, a lufa, toothbrush and paste, a cute notebook, lotion, and other neat little things that get forgotten in the rush to welcome baby into the world!  All of these items were forgotten when I went for my planned inducement!

I also made her a photo prop for when baby gets here.  It is a piece of wood bought at Hobby Lobby. I spray painted it blue and then used a chevron stencil to add grey chevron stripes to it.

I used my cutting machine to cut out "Brady" in vinyl and add it to personalize the prop.

I can't wait until this baby comes so that he can spoiled by all the mommies!  Kasey's oldest son plays sports with my youngest and we spend 9 months out the year together at practices, games and tournaments.  This baby is going to be SPOILED by all of us!